Using MVIS, A Rocket Intern Quickly Creates an App: MVOOVIES
August 21, 2019
MultiValue, Basic subroutines, Pick Systems, uuh, for a summer intern, all these terms were incredibly foreign. As a computer science student, I have some vague understanding (hopefully) of what a database, server, front/back end are supposed to do, but you could imagine my uneasy feelings when I was tasked with building a modern web app using trendy technologies and a legacy database service on the backend.
Before I continue, let me introduce myself. My name is Andrew Gorovoy, and I am a 20-year-old student out of Columbia University in the greatest city in the world, New York (sorry Denver). This summer I was given the opportunity to intern as a product manager in the Denver office. Quickly into my internship, it was apparent that there’s a talent shortage in the MultiValue industry. Young engineers out of college are tooled with modern web frameworks, Python, and Java. Most like myself, have no idea how to write a line of Basic code or initialize an MV database. This is where the idea for Rocket’s MultiValue Integration Server (MVIS) originated; a tool that encapsulates all the MV goodness and presents it in the form of consumable RESTful services that any developer new or experienced can leverage. In order to test this hypothesis, I was assigned the responsibility of building a fun web application using MVIS and modern technologies that are familiar to many of the young developers around the world. The following blog will describe my experience including the positive and the negative.
The first step was to learn a little about MVIS and MultiValue. I had the chance to sit down with Zain Master, the MVIS product manager, and discuss the product. My initial apprehension regarding the complexity and archaic nature of MV was dispelled in minutes. The MVIS portal and documentation were incredibly similar to other web APIs I have had the chance to use. The portal is modern and user friendly, the documentation is detailed and even provides the capability of testing endpoints using Swagger (combination of Postman and API documentation). With Swagger, I could quickly test different queries and see the data format in both XML and JSON format. I initially had reserved a whole day to familiarize myself with the MVIS product, but I was pleasantly surprised at how comfortable I felt after less than half an hour. Now, it was time to start building.
The local copy of UniVerse that MVIS was connected to, housed movie test data, so the idea came to make a mock movie streaming service. With an idea in mind, I began to consider potential technologies and frameworks for the project. I took a number of things into consideration. First and foremost, the goal of this project was to demonstrate how MVIS can help attract young new developers by allowing modern technologies to interact with MV databases. The technologies had to be trendy and widely used. In addition, I considered my own skill sets, and what technologies I was comfortable leveraging. Where these two spheres intersected resulted in the tech stack for the project. In the end, I decided to use Bootstrap and Bootstrap Studio for the UI layer. For the middleware, I decided on using Express.js and Node.js. A very popular modern tech stack is MEAN (MongoDB, Express.js, Angular, Node.js), and I tried to incorporate as many technologies from this stack as I could; we can all imagine that the M now stands for MV & MVIS not MongoDB.
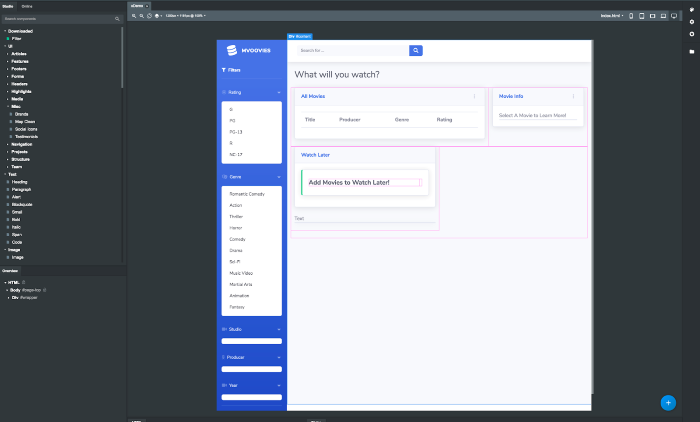
Okay, with an idea and tech stack solidified, I finally started coding. I started by developing the UI layer in Bootstrap Studio. Bootstrap Studio is an awesome technology that allows you to drag and drop Bootstrap components into different themes and templates. These themes even include customizable JavaScript animations and interactions. I wanted the platform to have a couple core features: a table that listed all the possible movies, a section for filters to narrow the movie options, a search bar, a separate panel that displays detailed information about movies, and finally a section where you can “Save for Later”. This included adding a couple of tables, a side panel, and a search bar. Once I was satisfied with the look and feel of the UI, I exported the project from Bootstrap Studio; the resulting folder contains all the HTML, CSS, and JavaScript necessary for the UI layer. Now, it was time to connect the UI layer to MVIS using Node.js and Express.js.
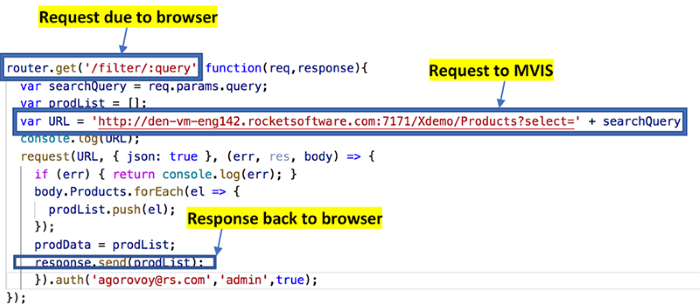
The way I think about middleware is analogous to a waiter bringing an order to a table at a restaurant from the kitchen and back; however, in this case, the table is the browser, and the kitchen is MVIS, and waiter is the Express.js server framework. I followed a consistent development model throughout which goes as follows: the end user interacts with the UI layer such as a filter button. This interaction is a result of some desire (the user wants to see rated R movies). This request is sent along to the middle layer or an Express.js route. As seen in the example below, when a filter button is clicked, the browser makes an HTTP request with the example URI pattern; Express.js accepts this request, and executes whatever is written into the handling logic, and then sends a response back to the browser. The magic is in the handling logic. The handling logic also acts like a browser. The handling logic receives a filtering request from the browser, then it asks MVIS to provide the necessary data. This is done by sending an API call to MVIS. Then, MVIS sends the data back to the Express.js, and once the data is sent over from MVIS, the handling logic sends it back to the front end where it is formatted and rendered in the browser. You ask why doesn’t the browser just make a direct call to MVIS; well, there are some serious security risks with this method. I won’t go into too much detail, but the concern is significant enough where most browsers have implemented a policy known as CORS (cross origin resource sharing) that enforces all calls made across different domains originate server side. Basically, the middleware layer need to calls different services, not the browser.
Developing the application with MVIS on the backend was a very enjoyable experience. The ability to test requests and simultaneously see the documentation for the end points was incredibly helpful and significantly sped up development time. In addition, my complete lack of knowledge of MV databases was in no way an impediment. MVIS encapsulated all the complexity of MV interactions, and made my job straight forward and fun. However, MVIS does have its hiccups. The way MVIS works, an MV developer can create a new service, and MVIS will display the endpoint. It does not work the other way around. I cannot create a new endpoint in MVIS and have it automatically defined in the data model. This was limiting in some ways, and required some workarounds that were not as efficient given the opportunity to create custom endpoints.
Now, I had a UI layer communicating with MVIS through Express. The app was running fast and looking great. The best part, with all the documentation and efficient modern technologies, I polished off this web application in about a week’s time. Reflecting on the initial goal of this project, I can confidently say that MVIS has achieved its objective. Developing with MVIS is a clean and painless experience. Thanks for reading this and please check out the screen recording of the app. In addition, in my next blog post, I’ll be talking about using MVIS in mobile development.


